Saturday, August 23, 2014

Lone Stars Are Tricky!

Lone Stars

I know why they're so "alone"... They are so darn tricky to make! 


Up until now,  the most difficult quilt that I have ever attempted was the Diamonds Jubilee bargello. Yes, it was hard, in that there were a lot of steps involved and you had to keep track of your strips, and most challenging of all, you had to sew accurate quarter inch seams or the segments wouldn't line up.
I think I have now surpassed that in difficulty!


Ten years ago, as a beginner quilter, I attended a novice quilting class in which we learned a ton of basics and a whole lot more! (Thanks, Chris Ludley!)
We were given 2 different quilt block patterns each class to make 2 blocks from each pattern using our light and dark fabrics in different parts of the block. It was so interesting to see how that differing placement dramatically changes the look of the blocks even though the fabric was the same.

In the end we had 16 blocks in total, using 12 different block patterns. It was so much fun to work on something new each Saturday! The only one that had me flummoxed was the LaMoyne Star pattern. Try as I might, after ripping and resewing the seams, I could not get the seams to match well or lie flat! Needless to say, I did not put the leMoyne star blocks in  the sampler quilt  I made. (I think I tossed them!)

My sunflower sampler quilt- hand quilted it myself- took almost 3 years to complete!

Till now, I have never tried that LeMoyne star pattern again, but I do like a challenge and I really don't like to admit defeat.  (Bluntly put: I'm stubborn! )

Auditioning the fabric for background setting squares and triangles


When I saw the pattern for the Lone Star sampler quilt in a McCall's magazine recently, I debated about giving it a whirl. The clincher was when my husband picked that pattern out of the magazine after I had told him I was contemplating making another king size quilt. (We recently got a new king size bed and now most of my quilts aren't big enough to use on it…)

Make a variety of light and dark strip sets, the pattern stated. Okay I can do that, I thought to myself.  Some of the 3 strip sets are 2 light fabrics and 1 dark, or the reverse, 2 darks and a light, or all 3 darks, etc. with 9 different combinations to create 9 different sampler stars.


Cutting the diamond shapes from the strip sets was a bit tricky but as long as you keep recutting your 45 degree angle it works out quite well.

Some of the strip sets

Sewing the 3 piece diamonds together was another matter…  :(
"To sew segments together, align raw edges, matching at seam lines," it said. Okay, no problem, I thought. But I missed the rest of the sentence…"1/4 inch from raw edges".

Try as I might, none of the seams lined up!  I wondered what was going on…

After going online and searching a few lone star sites, I found a You Tube video with some enlightening info...

What the directions SHOULD SAY in BLOCK LETTERS is:  "match your seam lines 1/4 inch IN FROM THE RAW EDGES, mark them if necessary, then sew the segments together with a 1/4 inch seam"!

Draw a line 1/4 inch in from edges using an erasable pen

I had more success when I started drawing a line on the wrong side of the fabric segments 1/4 inch in  from the edges. Then I put a pin through both pieces to line up where the seams should join each other. That worked about 90% of the time. (The times it didn't line up well was usually when I hadn't pressed the segments well enough or when some of my seams weren't  1/4 inch.)

Put pins through the 2 segments at the seams 1/4 inch in from the edges.


...Then carefully pin them together

Tricky -YES! Time consuming- YES!  but once I got my first star together I was so impressed with the results!


 Each 3 segments (made up of 9 diamonds,)  make one arm of the star.


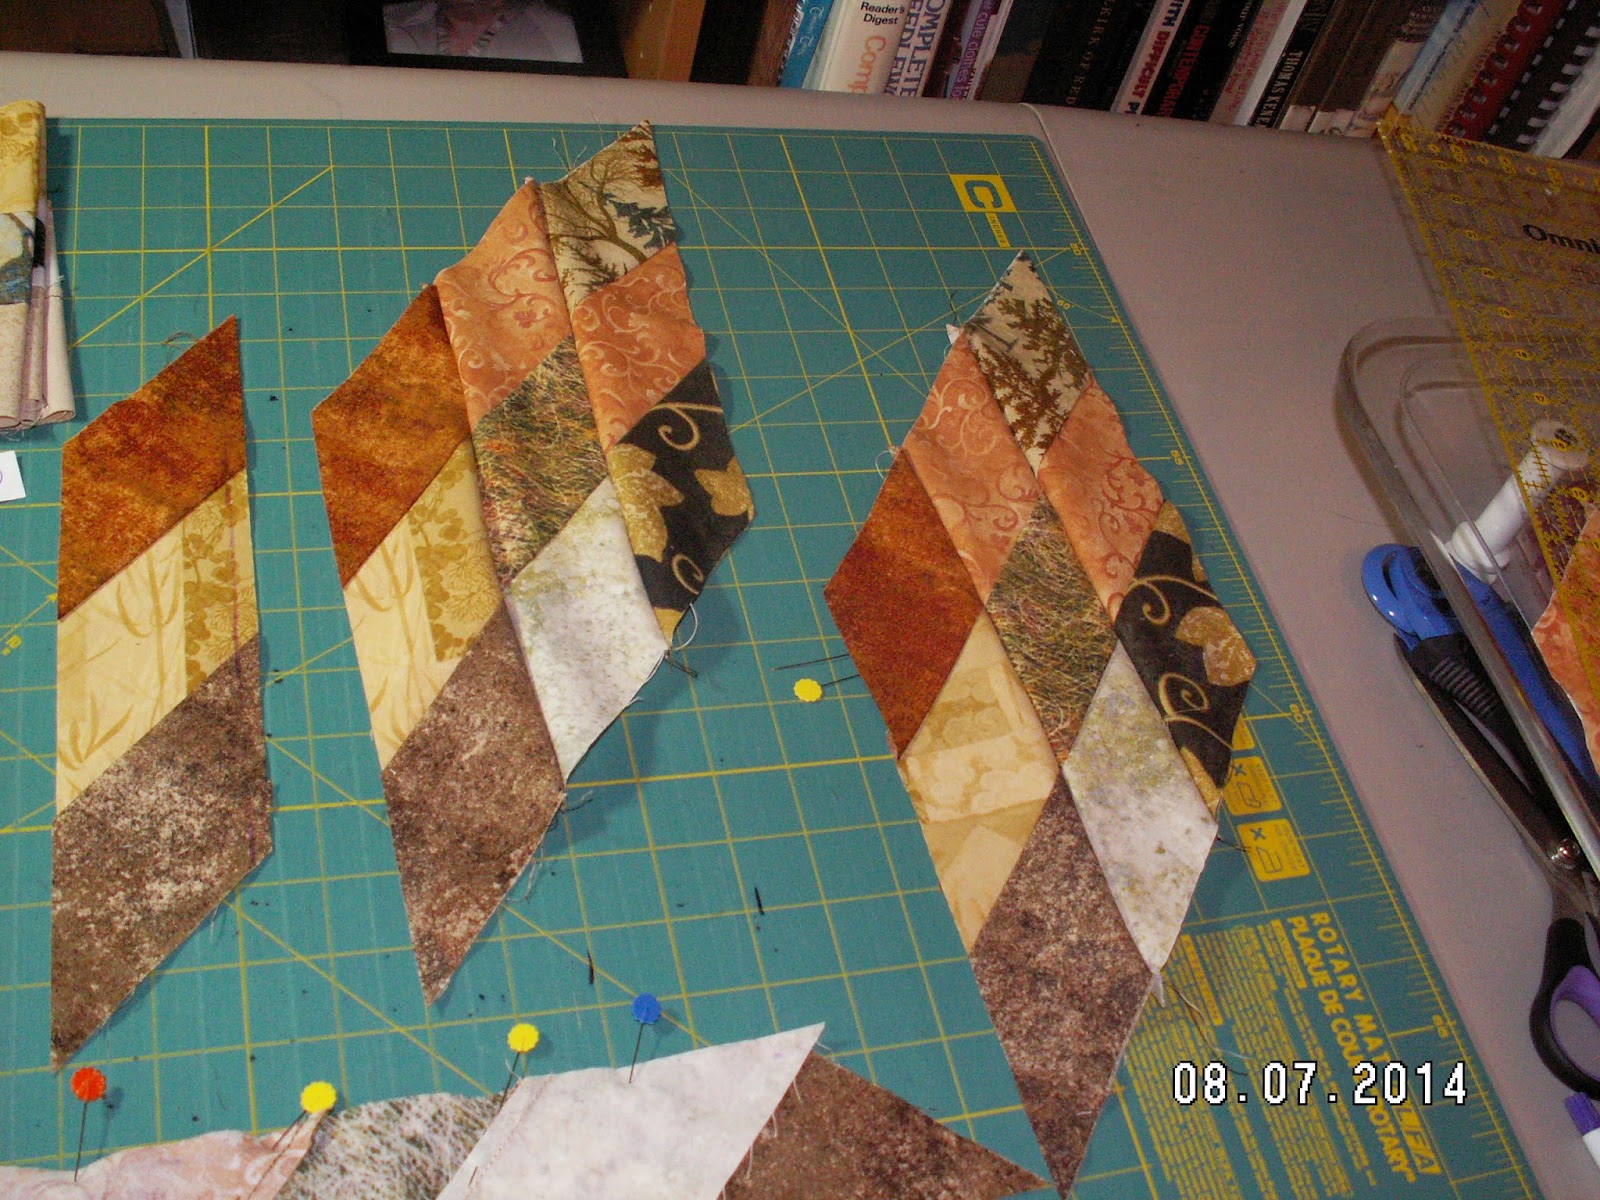
star segments- remember to press well

After pressing well, sew 2 of the 9 diamond segments together with a quarter inch seam, starting a 1/4 inch IN from the raw edge at the start and ending a 1/4 before the bottom edge. (Back stitch at the start and at the end to secure.)

Now do the same for those quarter star pieces, starting a quarter inch in and ending a quarter inch before the bottom edge.

To make this easier, use a pencil on the wrong side of fabric to mark a quarter inch seam at the corners. Where those quarter inch lines overlap is the exact point where to start and to stop sewing each segment. This is so that you can later set in the corner squares and corner triangles for your block background. (So far I haven't done that!)


Quarter star pieces- leave a quarter inch at the start and at the end when sewing them together


That part requires something called a "y-seam" which sounds tricky… but, once I wash and press my background fabrics,  I'm going to give it a shot!


Looking good so far!


Labels:

Tuesday, August 5, 2014

1600 Jellyroll quilt top


1600 Jellyroll quilt top

I always like to do something different so when one of the vendors at our Quilt Guild's quilt show in June, told me about an easy quilt top that you can make using 2 1/2 inch strips of fabric, I decided to give it a try.  It is called a 1600 Jelly Roll quilt as the strip of fabric that you use at the start is 1600 inches long! (Yup!) 
I bought a package of Northcott Stonehenge 2 1/2 inch fabric strips from that same vendor and started my Jelly Roll quilt top a few days later.

It's quite easy to do: You start off by taking all 40 of your  2 1/2 inch strips and sewing them together end to end. (You can sew them together straight across or diagonally like you would to make fabric strips for binging). Cut  about 15-16 inches off the first strip of fabric (don't use it) and then just randomly sew all the rest of fabric strips together.  (That helps to stagger the fabric joints a bit better in the quilt top.)


Take that big long strip of fabric, fold it right sides together (being very careful not to twist it), then sew that  together along one side. When you get close to the end, cut the loop of fabric there, then sew to the end. (In essence you have created 2 strips of fabric out of the long one which you've now sewn together.)

Do the same thing again, fold the 2 ends right sides together and then sew along one side, clipping the loop at the end.  Now you have 4 strips of fabric sewn together like in the photo below. 


Your length of fabric is reduced in half each step of the way. 

Fold the 4 strip fabric in half again, right sides together, sewing along one side. Now you have 8 strips sewn together Like the photo below.

8 strips of fabric sewn together
 Do the same thing again, then you will have 16 strips of fabric sewn together.

16 strips of fabric sewn together

Now do that same step one last time and you will have a quilt top with 32 half inch strips of fabric sewn together creating  a quill;t top that is 50 inches across and 65 inches long.

Each time you sew sides together your fabric strips will double but the length will shrink in half:


1 fabric strip = 1600 inches long
2 strips= 800 inches long
4 strips = 400 inches long
8 strips = 200 inches long
16 strips = 100 inches
32 strips = 50 inches 
resulting in a quilt top 50" by 65"

After that I bought some more Stonehenge fabric and cut 2 1/2 inch strips to make a border around my 1600 jelly roll top.  Next I cut 5 1/2 inch strips of another Northcott Stonehenge Spring Meadow fabric to make an outer border. I love the birds on that one! I really like the Northcott Stonehenge fabric line, especially the Spring meadow line. 

1600 Jellyroll quilt with 2 inch inner border and 5 1/4 inch outer border

The quilt top is now 65" inches wide and 80 1/2" inches long.  Thought that would make a nice size quilt to put on the couch or throw across the bottom of the spare bed.

I am going to look into getting some "Fireside", a soft type of fleece, for the back.  Not sure how hard it will be to quilt with, but I'm not quilting anything fancy, just a wave across the centre of each strip . Haven't decided yet how I will quilt the outer bird border...


I did some calculating and figured out how to make a baby quilt top using the same method:
If you were to sew 700 inches of 2 1/2 inch strips together, using the same method as the 1600 jelly Roll, you would end up with a quilt top with 16 fabric strips measuring 43 1/2 " by 32" inches.

Or take 600 inches of strips, keep sewing the sides together till it measures 37 1/2" by 32". If you added a 2 inch border around it,  it would end up measuring 41 1/2 " by 36", an adequate size for a baby quilt…

Might just give that a try! :)
Happy quilting!

One of our "little monkeys"


Labels: