Unicorn Quilt February/ March 2019
Claire's Unicorn Quilt January, February, March 2019
My 7 year old grand daughter had requested a unicorn quilt and after much hunting for patterns, I realized that there were very few to be had. Thus I set out to design my own.
I found some unicorn foundation pieced patterns on line and I bought two that I liked. I looked for unicorn fabric in the quilt stores here in central Alberta, but no one seemed to carry any. I finally found some unicorn fabric on a US fabric website (fabric.com) and proceeded to order some online as well as some solids in pinks, white and purples that I thought I might want to use.
Then set out to come up with a quilt pattern arrangement of my own.
 |
| Unicorn head pattern 18 inch block Dec 10/2018 |
 |
| Dec 12/2018 |
 |
| Dec 13/2018 |
My first step was to choose of my fabric to make the large 18" block of the unicorn head which I wanted for the centre of the quilt.
The centre block was a download from
www.robyniepatterns.com
It was very time consuming but turned out beautifully!
 |
| With sashing added |
 |
| Heart blocks made Dec 6/2018 |
 |
| 30 inches square |
After that I decided I wanted more foundation pieced unicorns, one at each corner of the quilt (more or less.)
I made 4 foundation pieced unicorn (12 inch blocks), 2 facing left and two facing right (I just sewed two of them on the reverse side, by tracing the back of it against a window using a pencil and ruler. )
I added a rectangle of unicorn print (6 1/2 X 30 3/4) to both sides of the 30 inch heart/ Unicorn head block, then added a 3 1/2 X 57 inch strip of pink leftover smooth minkee, at the top and bottom. I took another strip of unicorn fabric and added alternating 6 inch heart blocks with 6 inch purple squares beside it.
This pattern is designed by Kristy@QuietPlay, which I bought and downloaded from the Quiet play website.
Coming up with a design was a lot of fun. Doing the math toi make it all fit, not so much but with a bit of tweeking here and there it worked out.
 |
| Kitty helpers |
I added a rectangle of unicorn print (6 1/2 X 30 3/4) to both sides of the 30 inch heart/ Unicorn head block, then added a 3 1/2 X 57 inch strip of pink leftover smooth minkee, at the top and bottom. I took another strip of unicorn fabric and added alternating 6 inch heart blocks with 6 inch purple squares beside it.
Next- how to place the 12 inch foundation pieced unicorns to each side...
I made more heart blocks, solid purple fabric squares and unicorn fabric in between the paper pieced unicorns, tweeking all the blocks a bit so they'd fit.
I did the same pattern of minkee strips and blocks below the unicorn centre (about where kitty is lying in photo above.)
After that I added pink bumpy minkee fbric strips ( leftovers from other projects) to the sides of the quilt top. Then sewed purple minkee strips to the sides of the quilt top.
They measure 2 1/2 inches wide by length of quilt top. (3 3/4 X 57")
 |
| Pinned/ sandwiched unicorn quilt top with batting and pale pink with crescent moons minkee fabric on back. |
Next I added a border of 4 pink hearts ( 2 on each side ) and a rectangle of pink swirl fabric 6 1/2 X 34 3/4 " inches on all 4 sides, with a snowball block of unicorn fabric at each outer corner. The whole quilt top measured 70 1/2 X 80 inches.
Yes, It took a lot of calculating to make all the blocks in each different row work out.
But overall, I was a lot of fun to design this quilt as I went along, and I love it!
 |
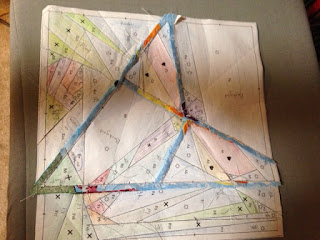
| Unicorn head foundation piecing pattern |
 |
| Machine quilting the unicorn head |
I used my Janome Horizon 8900 sewing machine to quilt this. I first sewed in the ditch around the centre block and also ditch quilted horizontally next to the minkee strips.
I free motion quilted curls on the white unicorn head and meandered on the background candy fabric behind its head.
I also free motioned sewed inside the hearts surrounding the unicorn head block. I continued to quilt my way outwards, row by row.
it was very difficult to sew a stretchy minkee strip to a plain cotton one. I had a lot of difficulty sewing the top and bottom pink minkee to the outer borders so it was taut. I had to open up two of the borders which I wasn't happy with and resew them.
This quilt was extremely time consuming but very gratifying to have completed as it is a very unique quilt and I'm proud of having designed it myself. No other little girl in the world has a quilt exactly like this one. :)


