Friday, December 30, 2011

Little Boy Blue Baby Afghan

Angel Wings Pattern


This pattern is from the Creative Knitting Magazine, May 2009 issue.


This baby afghan took me many weeks to complete. The angel wings pattern is 24 mostly different rows  with 20 stitches repeated 6 times in each row. It has the pearl stitch along the outer edge.

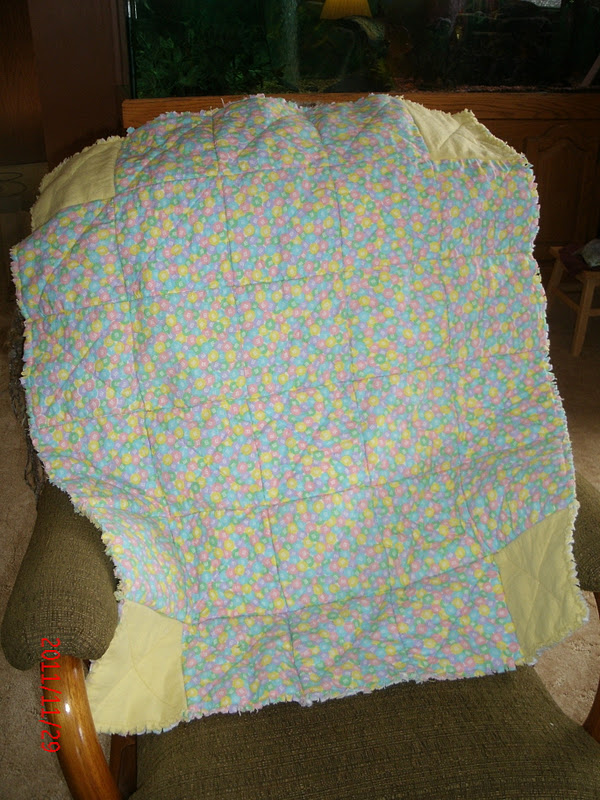
It isn't for the faint of heart, believe me! I made a yellow one in the same pattern a few months previously for my little (soon-to-arrive) baby granddaughter (before we knew she was going to be a girl. :) 
This blue one is for her twin brother. 

I have learned the skill of knitting "on the road", LOL!  (As a passenger of course.) This little blue blanket has travelled to Calgary and back home here many times.
The little yellow one  traveled even further. It went all the way to Penticton, BC and back, then all the way to Thompson, Manitoba and back, as well as to Calgary a time or two while it was being completed. :)

Next time... I will choose a pattern that is a bit easier so I can watch TV at the same time or have a conversation at the same time without having to stop and re-count stitches or worse, unknit and re-knit stitches quite so often!  I love how it turned out, but  after making two, I don't think I ever want to make this particular pattern again.

Although, now that our grandbabies have made their debut into the world and I see them wrapped up in their angel wings afghans, I must admit it was worth every minute of work! 


Labels:

Tulip Bag

Have been working on something for myself; NOT a Christmas gift, or something for my little soon-to-be-arriving grandtwins! ♥♥   Or anyone else's pending babies... :)

I am working on a tote bag made with fancy pieced tulip blocks. The blocks are quite time consuming although not really difficult. I recently joined the Heartland Quilter's Guild and this is one of the things that members are supposed to have (not sure exactly what the reason is...) as well as a pink or is it red name tag...


So (or should I say "sew" ! :) I have been working on the 8 tulip blocks, putting the finishing touches on them. After that I cut out the rest of the squares from the green and purple Climbing Lantern Pod fabric.The sashing to sew in between them is a light mauve batik fabric, 1/1/4 inches wide....


Two tulip blocks are sewn together with sashing in between.


An 8 inch lantern pod block is sewn below the tulip blocks and a triangle block is sewn above them.  


The 1 1/4 " sashing is also sewn along the right side of the blocks. 


 Four groups of blocks are made like this which will make up the bag once sewn together.


Then I quilted each group of blocks onto batting.
I quilted "in the ditch" around the tulip flowers and the leaves as well as on one side of the sashing.
On the Lantern pattern blocks I lowered the feed dogs and did a free motion meander pattern.

Next the 4 groups of blocks are placed in this windmill pattern and sewn together. The 4 lantern Pod blocks in the middle of the windmill make up the bottom of the tote bag. The 'arms' of the windmill are sewn together to make the sides of the bag.


This is the body of the bag so far....

Now I have to make the handles and the inner lining.
I have 2 different directions for putting the lining in the bag; one involves "sandwiching" the bag and the lining (right sides together), then sewing them along with the handles. The other involves putting edging on the top of the bag, but it doesn't explain how or when to put on the handles, so I'm not sure which I will do yet....

Labels:

Tuesday, December 27, 2011

Fitted Crib Sheet is a Bust!

Okay, the fitted crib sheet is still in the draft (or maybe I should say re-draft) stage.  Tried to fit it on the crib mattress at my daughter's place once it was done, but it is about 4 inches too long! I have no idea how that happened.
I put a pin in the spot on the sheet to mark where the end of the mattress is. Now I have to take the elastic off the end, (Oh, what the heck! maybe I'll just cut the end off and save some time!) Then I need to open the 2 side seams (which I had so carefully double sewed,) and cut 2 new side pieces out ( 7 inch squares), and re-sew the whole thing....  The sides of the sheet are a little loose, too, so I'll have to add more elastic... I really don't think I will be making too many more crib sheets from scratch.
Oh, well, live and learn, I guess!


Curiouser and Curiouser

New Blog view-
I'm feeling like Alice in Wonderland.... my blog is out of control!
Not sure how I ended up with this new version of my blog. And I don't know how to change it back.
I am going around in circles right now trying to find my layout/ page elements tab to change things. I'm supposed to go to my dashboard to do this, but I can't seem to find the tabs I'm looking for: Postings/ Settings/ layouts...
 This is quite frustrating....  :(

Monday, December 19, 2011

More Baby Diaper Change Pads :)


Made another baby diaper change pad today. I have given all of my first 4 away already so I decided to make a few more. I really like making theses! They are so easy to make and turn out so well. :D

Inner fleece lining for placing baby on

Outer blue alphabet fabric with handy pockets :)

I used the rest of a piece of yellow jungle animal feece and a piece of blue alphabet fabric with a leftover piece of batting in the centre. I also went back to using a ribbon to tie it closed instead of the velcro tab. The velcro tab is an additional step but the ribbon is so easy to add. (I will probably make velcro tabs again on subsequent change pads.)


I followed the same steps as before. If you are interested in making one here's the link to my blog tutorial for  baby change pads.

http://carolasquiltingblogspot.com/2011/11/baby-diaper-change-pads.html


The post below is a tutorial on making them with a velcro tab:

http://carolasquilting.blogspot.com/2011/11/blue-hey-diddle-diddle-diaper-change.html


My daughter liked this pad so much that she traded me for the little blue Hey Diddle Diddle pad I had made  first for her soon-to-arrive baby boy. :)


Labels:

Thursday, December 15, 2011

Fitted Crib Sheets

Elastic zigzag stitched around one end of fitted crib sheet


Tried my hand this week at something new... sewing fitted crib sheets.
First I went online and looked at a number of tutorials, some of which were helpful and some less so.

You need about 2 yards of fabric to make a fitted crib sheet, plus approximately 3 yards (or meters) of 3/8 inch elastic.

Measure the crib mattress to see how long and how wide the surface is. ( My new grandbabies' mattress is 53 inches long and 28 inches wide.)
Also measure the depth of the mattress ( in this case it is 6 inches deep.)

Your fabric needs to cover all of that, the top and the sides, so the length of the fabric must be a minimum of 6" + 53" + 6" which = 65 inches in length.
The width is 6" + 28" + 6" + 40 inches in width.

Then of course  you are going to double seam all the sides so you need to add another 1/2 inch on all sides for the seams.

You also will need some of the sheet to tuck underneath the mattress, at least 1 1/2 -2 inches on all sides
so the final length of fabric needed would be  69" and the width 44" - 45".

Cut your fabric that size (in my case 69 X 44").

Now to make the fitted corners:
Cut an 8 inch square out of all 4 corners of the fabric.
(I accidently deleted my photos showing this part.)   :(    

Next sew the cut sides of each (missing) square together.  Those will be the fitted corners.

One blog had a great suggestion for this part:
Sew an 1/8" seam with the wrong sides together, then flip it over and sew a 1/4" seam in the same place on the other side with the right sides together. It finishes the seam neatly with no edges to fray.

Sew cut corners wrong sides together, 1/8 inch seam

Then turn that corner inside out and sew another seam on top of the first one, this time sew a 1/4 seam.

You should have fitted edges on your sheet now.  Now it's time to sew the seam on the outer edge all around the sheet. I pressed a scant 1/4 inch all around the outside, then turned it under another 1/4 inch and stitched it.

 Now for the elastic:
Some blogs suggest sewing the 3/8 inch elastic on around the outside of both ends.
Some tutorials prefer that you make a 1/2 inch casing seam all around your sheet instead, leaving a 1 inch opening to thread your elastic through. (Using 2 safety pins, pin 1 end of the elastic to the opening, put the safety pin on the other end of the elastic and push it through the opening into the 1/2 seam and work it all around to the other side.  Then stitch the 2 elastic ends together, and close up the little 1 inch gap.)

 I chose to try the exterior elastic method, probably a mistake, though. It turned out to be more difficult than I expected.  First I didn't know how much elastic I would need and I only had enough to do one end.

Measure 12 inches from the corner seam on the long side of the sheet and mark it with a pin. Then do the same on the opposite side, 12 inches past that corner seam.

Mark the opposite end of the sheet the same way. (There should be 4 pins on the sheet now about equally spaced.)


Stitch the elastic on, starting at the first pin using a zig zag stitch. (Turn the elastic under about 1/4 inch at the beginning and at the end so you have no raw edges to fray.)
Stretch the elastic as you sew it on.... You will see the sheet pucker behind the needle as you stitch along all around the end of the sheet to the opposite pin. 

This was a bit tricky as the zigzag settings on my sewing machine automatically put the feed dogs down so the seam kept getting stuck under the foot and sewing in one spot. I had to keep helping it along, gently pulling the sheet through behind the foot with one hand and with the other, trying to stretch the elastic and keep the seam straight underneath it. I really needed 3 hands for this part...

I think maybe I should change to a new sharper needle and which might help. 
Or maybe I should set up my old Pfaff sewing machine and do this part on there. The feed dogs are manual on that machine and I can keep them up.  (I wonder if I should check the operating manual on my Janome machine to see if I can override the feed dogs going down during the zigzag stitch...)

I'm staring to wish that I had chosen the other option, making a 1/2 seam to thread the elastic through.... But of course if you want to try that option, you will have to add another inch to the length and to the width of your fabric...  But it was too late for me to do that since I had already cut  the fabric out....

Tomorrow I will get some more elastic and finish the other end. 
Then this weekend when we visit my daughter I'll bring the fitted sheet along to try it out on the crib mattress. Something tells me I should have made it a bit deeper in the corners....
We'll see!    :)


Labels:

Friday, December 2, 2011

Warm Flannel Baby quilt


I love making these flannel raggy baby quilts. They are easy to make and they turn out looking so cute in a short period of time.

I made my latest one (Raggy Baby #4) using M&M's flannel for the back and a variety of blue teddy, yellow animal , solid yellow with a few solid pink blocks thrown in for good measure.  Every quilt should have a little surprise on it, so on the back, the 4 corner blocks are solid yellow instead of M&Ms.

Back of raggy Baby quilt


I made this little quilt with 5 1/2 inch squares of leftover batting in the centre of each flannel block for added warmth, unlike the first 3 raggy quilts that I had made, which had only the 2 layers of flannel. (The first ones are light and airy, the perfect little covering during warmer weather... To view them see my previous blogs- 'Rag Teddy Bear Quilt' 9/14/11, and 'Rag Baby Quilt' 8/4/11).


 Each of these new blocks is  made up of two 7 inch squares of flannel sewn together with right sides out with a 1/2 seam around the outside.


Because they have batting in the centre, there flannel blocks had to be quilted with an 'X' ( or any design) through the centre to keep the batting from shifting in the wash. I used a self-fading fabric pen and a ruler to draw the Xs on each block.


Once the flannel blocks are completed, I arranged them on the floor in a pattern and took a photo. Then I switched some blocks around to get a more pleasing pattern (too many pink blocks together ... needed to be changed), took another photo and wrote out the block design on a grid so I would remember it when it was time to sew the  blocks in rows.


 The blocks are sewn together with the seams pointing towards the outside, and joined with a 1/2 " seam.
 Then each row is sewn together, again with the seams outwards, making sure at each block corner to have the top seam going in one direction and the bottom corner seam going the opposite direction so there is not too many thick flannel layers to try and sew together.  Remember to adjust the tension on your machine.

There are 5 blocks in each row with 6 blocks in total, making it a rectangular shape. Finished size 30" X 36".  I was quite pleased with the finished results. It will be a nice thick, warm quilt for a new baby! :)


Completed quilt blocks waiting for their quilted "X" in the centre


This one is not for my own grandbabies-to-be. They already each have a raggy baby quilt, as well as 2 regular baby quilts each that I made recently; (two for at home and one to keep at Grandma's house. :)

This latest little padded raggy quilt is for another friend/ family member who is expecting, or I just might put it up on our newly created ESTY site to sell it....  More about that later! :)

Labels: , ,