Friday, May 22, 2020

More 2019 quilts Daniel's Baby quilt

Daniel's baby quilt July/ August 2019


One of my close friends was about to have her very first grandbaby, a baby boy so is was trying to figure out an easy baby quilt to make him.
I have so many fabric scraps now that I decided it might be a good time to use some of them up.
I collected a lot of them together and started cutting 2 1/2 inch strips. I found a strip set package of mostly blues, greys and light browns at the Red Deer quilt show and I got started.


I started making scrappy 9 patch blocks out of the 2 1/2 inch squares, (creating 6 inch blocks.)


I also had some Winnie the Pooh fabric in my stash which I though would go well. One of the fabrics had small 1 inch squares throughout so I decided to put  a 10" X 15" inch piece in the centre of the quilt like a panel.  I sewed a 1 1/2 inch border of blue print fabric around it. 


6 X 6 inch 9 patch blocks

Next I laid out a lot of the 9 patch squares to see which ones would fit together without having 2 squares the same too near each other.The I sewed 3 squares together and sewed them on both sides.
Next I sewed 4 of the 9 patches across the bottom.

After that I sewed another blue print fabric 1 inch border around it.

The next part was sewing another border of  2 1/2 squares all around.

Then add a third blue 1 1/2 inch border all around.


The last step to this baby quilt top was to add an outer border (4 inches wide) of the same fabric as the centre panel.


The completed quilt top measured 40 X 45 inches.

Sandwiched and pinned together
I sandwiched and pinned together the quilt top with batting and a blue bumpy minkee back fabric.

Then I machine quilted it, sewed on the binding and added a label.
I drove up to Edmonton at the beginning of September to cuddle the baby and give Daniel his new quilt. :)


Star Wars Quilt for a Special Boy May 4/ 2019

Star Wars Quilt for a Special Boy

My 7year old (almost 8) grandson needed a bigger quilt. His toddler sized monster trucks quilt was too small. I asked him what he wanted on it and he said "Star Wars"!  So I set about looking at fabrics and patterns and trying to find one I could make him.
After looking at a variety of patterns I decided on Tribal Vibe pattern from McCall's quick quilts - Oct. Nov. 2014 issue (pages 20-22).
It has a variety of large 12" snowball blocks (which would showcase the Star Wars fabric well) in between 12 " chain blocks.


I also downloaded some paper pieced Star Wars block patterns, a 12 inch Ti fighter pattern, a Darth Vader block pattern and an appliqued R2D2 block pattern :


tie fighter block


R2


I made 15  nine patch chain blocks- solid blue/ red with Star Wars centre. ( 9 blocks have blue star wars centres, 6 blocks have red Star Wars centres.)


I made 12 snowball blocks- 6 blocks with dark blue Star Wars fabric with grey corners and 6 blocks red Star Wars fabric.  (All blocks are 12" square.)


There are 5 blocks in each row, with 6 rows altogether.
I added a red 2 inch wide outer border with 3 red and blue 2" blocks at the corners.
Outer border is 3 inches wide, Starry Night fabric

The completed quilt measures 70" X 80" inches.

Star Wars quilt sandwich 


After washing the kitchen floor, I sandwiched the quilt layers together, then pinned them well using up most of my safety pins.
Next came the decision on how to quilt the blocks.... It took a while to come up with something but I decided starts were definitely called for.
I free motion quilted wavy lines across the centres of the blue and the red snowball blocks, 

The 9 patch blocks had 4 stars , one on each solid blue square. (I drew the stars freehand with an air erase pen. )

The 4 (chain) corner blocks had vertical or horizontal lines quilted on them, (alternating each row).  


I finished the quilt on May the 4th ironically enough. :) 


Quilting has been completed now. 

Here is the back of the quilt showing my machine quilting:


I am really proud of this one! :D  


Last : a Star Wars Pillowcase

Star Wars pillowcase


Thursday, May 21, 2020

Paris Match (2018)

Paris Match Quilt Top only

I loved this pattern from the first time I saw it in the Quilt magazine.  I love how the blocks go together to form pinwheels when there are actually no pinwheel blocks made at all! :D


Paris Match

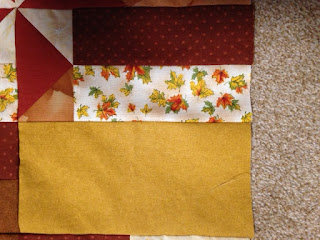
Pattern June/July 2012 edition of MCCall's Quick Quilts page 9These are 8 inch blocks made from 2 1/2 X 4 1/2 " inch rectangles. There are 4 different blocks. Each block has 1 or 2 flying geese blocks within it (2 1/2 X 4 1/2").
The fabric I used was: 
Cream print
Orange maple leaves
Rust dots
Small Leaf print 
Solid dark red (flying geese centres)


Block A

Block B 


Block C

Block D

The pattern calls for 6 rows or 6 blocks each to make a square quilt, 48" X 48" and then you add 9 1/2 inch mitered borders.
After sewing all my rows together (Using the complicated assembly diagram on page 11 of that McCall's Quick Quilt issue), I decided it would be a more practical as a rectangular throw size, so I made 12 extra blocks (repeating rows 4 and 5 again). Then I added row 6 back on to the end for a quilt top that measure 48" X 64" without the outer borders.
 
F

Finished Paris Match throw quilt top 


I added a 2 inch cream inner border and used up most of the rest of the rust dots fabric (which I love) on the 4 inch wide outer border. 
The quilt top measures 60" X 76 1/2"

Yet to be made into a quilt.


Wednesday, November 27, 2019

Unicorn Quilt February/ March 2019


Claire's Unicorn Quilt January, February, March 2019


My 7 year old grand daughter had requested a unicorn quilt and after much hunting for patterns, I realized that there were very few to be had. Thus I set out to design my own.

I found some unicorn foundation pieced patterns on line and I bought two that I liked. I looked for unicorn fabric in the quilt stores here in central Alberta, but no one seemed to carry any. I finally found some unicorn fabric on a US fabric website  (fabric.com) and proceeded to order some online as well as some solids in pinks, white and purples that I thought I might want to use.
Then set out to come up with a quilt pattern arrangement of my own.


Unicorn head pattern 18 inch block Dec 10/2018

Dec 12/2018

Dec 13/2018


My first step was to choose of my fabric to make the large 18" block of the unicorn head which I wanted for the centre of the quilt.

The centre block was a download from
www.robyniepatterns.com

It was very time consuming but turned out beautifully!


With sashing added


n
Heart blocks made Dec 6/2018
 These heart blocks are a simple 2 piece snowball pattern,  from a magazine that I had,  (American Patchwork and Quilting- February 2017, page 64- Keys to my Heart pattern).

30 inches square
This is the centre of the quilt.
After that I decided I wanted more foundation pieced unicorns, one at each corner of the quilt (more or less.)


I made 4 foundation pieced unicorn (12 inch blocks), 2 facing left and two facing right (I just sewed two of them on the reverse side, by tracing the back of it against a window using a pencil and ruler. )


This pattern is designed by Kristy@QuietPlay, which I bought and downloaded from the Quiet play website. 
Coming up with a design was a lot of fun. Doing the math toi make it all fit, not so much but with a bit of tweeking here and there it worked out.


Kitty helpers


I added a rectangle of unicorn print (6 1/2 X 30 3/4) to both sides of the 30 inch heart/ Unicorn head block, then added a 3 1/2 X 57 inch strip of pink leftover smooth minkee, at the top and bottom.  I took another strip of unicorn fabric and added alternating 6 inch heart blocks with 6 inch purple squares beside it.


Next- how to place the 12 inch foundation pieced unicorns to each side... 
 I made more heart blocks, solid purple fabric squares and unicorn fabric in between the paper pieced unicorns, tweeking all the blocks a bit so they'd fit.

I did the same pattern of minkee strips and blocks below the unicorn centre (about where kitty is lying in photo above.)


After that I added pink bumpy minkee fbric strips ( leftovers from other projects) to the sides of the quilt top.  Then sewed purple minkee strips to the sides of the quilt top. 
They measure 2 1/2 inches wide by length of quilt top.  (3 3/4 X 57")


Pinned/ sandwiched unicorn quilt top with batting and pale pink with crescent moons minkee fabric on back. 


Next I added a border of 4 pink hearts ( 2 on each side ) and a rectangle of pink swirl fabric 6 1/2 X 34 3/4 " inches on all 4 sides, with a snowball block of unicorn fabric at each outer corner.   The whole quilt top measured 70 1/2 X 80 inches.

Yes, It took a lot of calculating to make all the blocks in each different row work out. 
But overall, I was a lot of fun to design this quilt as I went along, and I love it! 


Unicorn head foundation piecing pattern


Machine quilting the unicorn head


I used my Janome Horizon 8900 sewing machine to quilt this. I first sewed in the ditch around the centre block and also ditch quilted horizontally next to the minkee strips. 
I free motion quilted curls on the white unicorn head and meandered on the background candy fabric behind its head. 
I also free motioned sewed inside the hearts surrounding the unicorn head block. I continued to quilt my way outwards, row by row.


it was very difficult to sew a stretchy minkee strip to a plain cotton one. I had a lot of difficulty sewing the top and bottom pink minkee to the outer borders so it was taut. I had to open up two of the borders which I wasn't happy with and resew them. 

This quilt was extremely time consuming but very gratifying to have completed as it is a very unique quilt and I'm proud of having designed it myself.  No other little girl in the world has a quilt exactly like this one. :)


" Life At the Lake" Wallhanging June 2018

I started my "Life At the Lake " wall hanging in early June, 2018. I decided a while back that I needed to hang something intriguing on my empty bathroom wall space.  I thought a wall hanging depicting a variety of things found here at the lake in the summertime would be lovely to depict...

I had collected a variety of paper pieced block patterns to put together, some from the Quiltmaker magazine Summer 2015- a pattern called "Over by the Pond" and some were downloaded from Craftsy, and others were free on the internet.

I started off making 2 small foundation paper pieced dragonfly blocks, (6 1/4X 6 1/4")


Then I worked on 2 spiky plant blocks,  (7 1/2 X 7 1/2") both also foundation paper pieced. These were relatively easy and fun to make.


Next came the 2 Frog blocks, (7 1/2 X 9 1/4"). I found the directions in the Quiltmaker magazine Summer 2015.


After that I decided I wanted some butterfly blocks since there are a variety of butterflies here at the lake, notably the yellow swallowtails (usually found on my lilac blossoms in May) and one that looks similar to a Monarch.
I used a free patten from the internet called B is for Butterfly, (a butterfly from the side.)   (8 1/2 X 8 1/2"). and decided to make them bright and colourful. I went through my stash and found a variety of fabrics.


My next butterfly I wanted shown from the top. I found "Breezy Butterfly" by Marney (Marianne Hertzel@gmail.com)  I added some sashing to make it 8 1/2 X 8".


Next I downloaded a free dragonfly pond block called "Spring in the Pond", which was fun to make, (10 1/2 X 10 1/2")


Back of dragonfly/pond block


Segments of pink pond lily


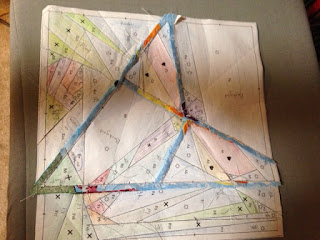
Pink Pond Lily- I tried to buy this pattern off the internet, but none of the links I tried worked. I printed a copy of the pattern lines from Pinterest and magnified it 140%.
Then I drew heavy black lines around the segments and used markers to colour in the petals, lily pad and water.

Next I printed that a second time and cut the separate segments out. Now they needed 1/4 inch seams all around, so I glued them far apart so I could draw the seams on all of them.
Lastly I printed these up on a sheet of paper piecing paper to use. A lot of work! I would have gladly bought the pattern and saved all that hassle.


Pond/Water lily 
I love this water lily!

I arranged and rearranged all the blocks and auditioned some fabric to make the sashing in between the individual blocks.


Auditioning fabric to use for sashing
Last but not least I made 2 bumble bees to depict the hardworking pollinators in my garden which I love. In all the years I have been gardening (over 45 yrs) I have never been stung by a bee. I feel safe among them and I garden next to them and feel safe. They know That I love and appreciate them, and they have nothing to fear from me.

Voila! Over the Pond quilt completed.


I entered my wall hanging in the Heartland Quilt Show in Stettler, Alberta on June 8, 2019, and to my surprise I won a first prize ribbon for Small/ household category!   :D


At the Heartland Quilt Show June 8/19

One More!

My first ribbon, first prize!

I was so thrilled! Happy quilting everyone.