Sunday, January 24, 2016

Bows and Boughs- Christmas table runners


Bows and Boughs Runners


It's always nice to have a decorative table runner at Christmas. Long before I took up quilting, I had bought me first table runner at a craft sale and it was a Christmas one. It was quite simply made from two pieces of fabric, one of which had a border around it, but I loved it and still use it.  🎀


Since our daughter and her husband were hosting Christmas this year with all of his family plus a few from our side (about 16 people counting all the kids), I thought she should have a nice big fancy table runner for her huge dining room table.  I had enjoyed making the "Bows and Boughs" paper pieced presents and evergreen tree blocks so much that I decided to make some extra ones and turn it into a table runner for her.


 Paper pieced tree blocks and present and bow blocks

The bow blocks were the trickiest to make as they each involved 7 or 11 pieces.
The tree and present blocks are each 5 1/5 inches by 8 1/2 inches in size. I added a strip of white between each present block and tree block to make it 16 inches wide.


I made a similar Bows and Boughs block at both ends.  In between I put a strip of 2 1/2 inch dark green sashing then added a piece of red reindeer print fabric to the centre. Last I added a 2 1/2 inch dark green border to both sides of the runner.   This reindeer bows and boughs runner measures 21' X 58" in total.


I added the batting and the green mistletoe back fabric, then used the back fabric to the front to make a mock border.  Next I machine quilted it. I echo quilted 1/4 inch around the tress and presents in white thread, then ditch quilted around the sashing in dark green. I free-motion quilted a small mistletoe pattern on all the sashing in dark green thread, and did a simple meander pattern on top of the reindeer centre fabric.   Last came the mock edging.

I  liked this runner so much, I decided to make one for myself, so I continued paper piecing more bows, gifts and trees.  I chose a green swirl fabric for the centre of mine. My table is much smaller than my daughter's so I reduced the size of the centre fabric. I added the same dark green sashing to make a runner measuring 20 3/4 X 44.

20 3/4" X 44" Bows & Boughs runner- kitty approved!
I used an off white Christmas fabric for the back. After adding the batting to the middle, I sandwiched the 3 layers together, turned them right side out and quilted the top. I echo quilted around the trees and presents, then ditch quilted around the sashing.
Next I free motion quilted some mistletoes shapes into  the centre green fabric and also on the 2 centre sashing strips. I just did a simple swirly stitch on the outside sashing.
Last I sewed a 1/4 inch seam all around the border and I was done!

I'm really happy with how my table runner turned out! The only downside was that I didn't get mine finished till mid January! I guess it will just go into the linen closet till next Christmas.
After that I got industrious and started putting the extra tree and presents blocks together into place mats. Those are still unfinished, but I have lots of time to do that before Christmas 2016.  🎅


😊
Happy quilting!   

(Paper piece templates were from the McCall's Quilting magazine- Dec. 2011 issue pg 58)


Labels:

Saturday, January 23, 2016

Bows and Boughs Wall Hanging


Bows and Boughs Wall Hanging


 In the 10 years that I have been quilting, I have never made a Christmas wall hanging!  I was so focused on making quilts, place mats and runners, that I had only in the last 2 years made any wall hangings at all. ( One Hallowee'en paper pieced hanging "Wacky Jack" my Oct. 2013 blog and a paper pieced cats and plants hanging, "Tabby's Place" May 3, 2014 . See Photos below.)

So I decided to rectify that over sight but couldn't really fined a specific pattern that I liked. I looked through my old quilt magazines and saw several Christmas quilts with blocks that I liked so I decided to use 3 different ones and put them together into one wall hanging.

The first block I made was a Snowman block. I had downloaded that pattern off the Connecting Threads website in the fall.  It involved cutting out the 12 1/2 inch square background, which I did from a blue and white fabric that I had bought previously. Next I printed a copy of the template pieces and cut them out.

After that I cut the snowman's various pieces from scrap fabric, his body, hat, arms and carrot nose, plus 3 snowflakes.  I used Steam a Seam 2 to adhere the pieces onto the background, then I used a satin stitch (Stitch # 52 on my Janome 7700 Memory Craft) to stitch around everything, changing the colour of thread as needed.  (On the back I used a thin muslin to give the appliqué some stability.)
Last I used a straight stitch on my machine and black thread to carefully stitch his eyes and smile, going over it twice. Voila he was done and I love his happy smile!


The second block I made was the wreath block. I printed and cut out the template pieces, tracing the wreath pieces on different green fabrics and the bow parts on red fabrics. Again I used Steam a Seam on the backs. The back fabric is a white on white snowflake fabric which I had bought a while back from Connecting Threads.  I arranged all the wreath pieces they way I liked, then pealed the paper off and pressed them on. After that I did the same for the bow pieces and 3 red berries on top.
Last I did t quilting, I free motion quilted the wreath pieces one by one, about  1/3 of an inch in from the edges, but used a satin stitch at the edges of the bow and berries.
(This pattern was from the Mc Call's Quilting magazine December 2012 issue page 68)

The third block I decided to make was the one called Bows and Boughs (from Mc Call's magazine Dec. 2011 issue page 58). It involves paper piecing which I rather like. (More about Bows and Boughs in my next post.)
Again I printed the paper piece patterns on my computer (using thin paper- easy to tear off.)  There were 2 different presents and 4 different bows, plus the trees which all went together to make a quilt, but I just needed one of each for this hanger. I added 3 1/2 inch squares of Christmas fabric under the present and tree blocks to look like  small presents. It was fun to make and it lead to making other present blocks and tree blocks which I turned into 2 table runners, but that's my next blog post. :)

Happy quilting!


Other wall Hangings


Tabby's Place Blog
http://carolasquilting.blogspot.ca/2014_05_01_archive.html

http://carolasquilting.blogspot.ca/2013/10/wacky-jack.html#links
Wacky Jack wallhanging


Advent Snowman Calendar Nov/Dec 2015


Snowmen Advent Calendar   November/ December 2015


Growing up, we always had an advent calendar as kids to count down the days till Christmas.
I had ordered a kit from Connecting Threads to make an advent calendar for my grandkids.
The kit was a simple panel with snowmen printed at the top and 24 numbered squares under that. Another piece of fabric had 24 small mittens printed on it.


You were supposed to put batting behind the mittens, cut them out and hang them on each numbered square as each day came along. My daughter thought that was not a good idea as the little ones (who were aged 11/2 years and twins 3 1/2) would probably play with and lose most of the mittens before the month of December was even half over.   


Pockets! I decided numbered pockets were the answer.  I kept the top of the panel with the printed snowmen, but cut the rest off.  I made 5 rows of 5 pockets instead, then appliquéd the 24 mittens onto the pockets.  I used a quilt/ fabric pen to write the numbers on the mittens. I had a 25th pocket so decided to fussy cut a reindeer from some fabric scraps and wrote a "25" on that.  That would be the Christmas pocket!

After that I cut a piece of back fabric to fit, added the batting in the middle and made a mock edge* on it.


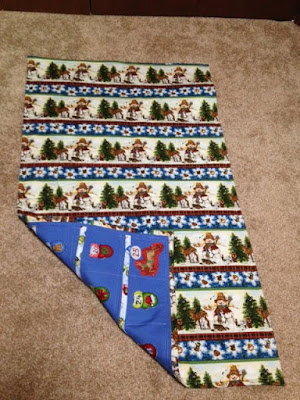
Snowman back fabric
 🎄


It turned out quite well and my daughter filled the pockets with little treats and prizes for our grandchildren to "discover" each day. A nice way to do the Christmas count down.      


 (How to do  Mock edging:  Cut the excess back fabric to 1 inch wide, fold it in towards the quilt and press. Flip it over to the front and sewing it down.)  Easy Peasy!